Monday, September 29, 2008

Week 9 Work Check

Group Critique Session - Work Check

* Decided to build sound-based and light-based portable installation.
* To 'Do' :
- Sensors : soft switch (mat) or photoresistor, see which one works the best.
(If the soft switch (mat) is used, decide on the size.)
- Figure out how the light works on daytime.
- Build a life size light pole including the sensor.
- Decide on the light (intensity, colour and power) - user test.
(because it is a portable installation, power source will be based on batteries, Andreas' suggestion will be using LED for the light).
- Decide on the sound (what sound works) - user test.
- Decide on size and type of the speakers.
- Figure out how to playback the sound (computer/ cassette recorder).
- Decide on the structure of the poles.
- AT LEAST, LIGHT-BASED LIFE SIZE PROTOTYPE SHOULD BE DONE BY 02/10/08.


* List of problems to be sorted out.

Thursday, September 25, 2008

The End of the Workshop

Final Day
*Presentation


* The cable tack doesn't work.
* Zul suggested to use masking tape, but it should be cut nicely and tidy.


* View from left side of the pillar.


* View from the back of the pillar.


* View from the right side of the pillar.


* Final Setup.
* The sound workshop and collaboration work end here 25/09/08.

Wednesday, September 24, 2008

Troubleshooting Day

Set - Up


* After soldering every cables to the walkman's board.
* Closing the lid of the walkman.


* Front view.


* Back view.


* Masking taping the cables.


* Cables that are too long are tied together and masking taped to the wall.


* Photoresistors are taped in low position.
* There are 4 photoresistors in total.
* Each walkman is connected to 2 additional speakers and 2 photoresistors.


* Creating patterns on the wall using cables.


* Walkmans placed at the back of the pillar.


* Problem occurs :
- One of the photoresistor doesn't work properly.
- Probable mistake : loose connection, mistake in connection points.


* Zul helped out solving the problem.
* One of the photoresistors works only if its partner (from the same walkman) is working (covered by shadow). 


* The photoresistors work in a very short range, meaning user has to walk really close to it to trigger a change in the sound.
* Zul's idea : make a black tube to narrow down the range, so it won't take lights from everywhere.


* Try out set up.

Experiment day

Sound Modification, Installation and Interaction


* After the opening of the walkman. 
* Modification of sound can be experimented using either alligator clips or wet fingers.


* Teammate : Tienny Setywati (Animation Art student).


* The interaction lies in the photoresistor (LDR).

* Left image : mine.
* Right image : Tienny's.
* Decided mine would be sound modification in pitch and Tienny's would be sound modification in speed.
* Alligator clips as the marks where sound changes.


* Each group will get 4 additional speakers, which make 8 speakers in total (4 additional speakers and 4 speakers from both walkmans).
* Mounting the speakers on the pillar.


* Measuring the length of the wires needed.
* Red wire for positive, white wire for negative.
* Tienny's suggestion on the colours of the wires (red and white cables represent audio colour in television).


* Decided to place both walkmans behind the pillar.


* After measuring, soldering the wires on the speakers.


* Black wires used for photoresistors' cables.


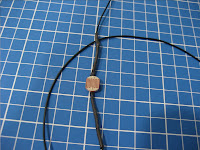
* A photoresistor connected to two cables.


* Measuring the length of the cables, try mounting the photoresistor on the pillar.


* Soldering the speakers' cable on the walkman's board.
* The experiment ends here.

Media Integration Week

Week 8 - Sound Workshop
Lecturer : Zulkifle Mahmod

* Each student received a walkman.
* Record sound around the school and its surrounding for approximately 2 hours.
* Team up with a friend (2 students in 1 group).
* Teammate chosen : Tienny Setyawati (Animation student).
* Choose a site in block G level 2 as the installation site.
* Site chosen : A pillar next to room G203.


* Installation site chosen.

Saturday, September 20, 2008

Week10 Processing

Visual Presentation

* Time :  Week 10, 08/10/08.
* Presentation on a screen-based work using sound (microphone) or movement (camera) or both as the input.
* Work : concrete object (on the screen) or abstract visual. 

Wednesday, September 17, 2008

Prototypes

Series Prototyping


* A box as the sidewalk.
* The size is similar to the first prototype.


* 3 boxes for 3 prototypes.


*  1 of 3 - 180 degree Rotation
- How it works : As a pedestrian steps on it, it will slowly turn (180 degree) and pedestrian will arrive back to his original position.


* Pieces of circles as the rotating board.


* Top/outside view, a hole to hold the pivot.


* Inside view.
* A toothpick as the pivot.


* Pieces of circles (material: art card) are stacked together to create a stronger board.


* Pivot is glued at the base and masking-taped.


* 180 degree rotation prototype.


* 2 of 3 - Light (Flame of Life)
- How it works: As a pedestrian moves/walks toward the edge of the road, light gets dimmer.

* Materials.


* LEDs.


* Bright light, placed in the beginning of the path.
* Low resistance resitor.


* Dimmer light, placed in the middle of the path.
* 2 low resistance resistors.


* Dim light, placed in the middle of the path.
* 2 lower resistance (than the before) resistors.

* The fourth LED is just as an LED with no power supply, placed at the edge of the road, end of the path.


* Connection of the lights.


* Soft switch learned in Wearable Technologies class.
* A carpet where the pedestrians walk through.
* Triggers light.


* In the making of the switch.
* The fourth row has no use.


* Conducive fabric sewn on the cloth.


* Connecting the cable to the cloth.


* Light holders.


* 4 big holes to hold the light holders
* 3 small holes to insert the cables.

* Cables from the cloth are inserted into the small holes.
* Outside and inside view.

* Light holders are inserted in the big holes.
* Outside and inside view.


* LEDs are inserted into their holders.


* One cable goes to the board, the other is attached to another piece of cloth with conductive material sewn on it (top cloth).

* Outside and inside view.
* Cable extension.


*Inside view.


* After connecting.


* Top and bottom.
* Outside and inside.


* Light - Flame of Life Prototype.


* 3 of 3 - Sticky Floor

* A hole on top of the box to place the flipping floor.


* Holders of the flipping floor.


* Holders are attached to the box (Inside).


* Flipping floor.
* Sticky floor, using double-sided tape to simulate the sticking part.


* Sticky flipping floor attached on the box.


* Sticky floor prototype.


* Others

* Traffic lights stands, 6 pieces to make each stand.


* Traffic lights.


* Prototype of 180 degree rotation.


* Prototype of sticky floor.


* Prototype of conveyor belt (previous/1st prototype).


* Prototype of Light (Flame of Life).


* Light is lighted up, if a pedestrian steps on the carpet.


* The prototypes.